Eclipse is one of the most popular IDEs for Java development. Some of the settings are “hidden” and take time for you to find out. Some problems, such as Eclipse removing red marks on projects, are annoying. Here I list some eclipse java settings that will help you save time.
Common eclipse settings are:
1. Open the Exiting Projects
2. Remove red mark on Project in Package Explorer
3. Change System Library
4. Run JUnit
5. Import External JARs
6. Turn on Autosave
7. Run with Arguments
8. Increase JVM heap size to run program
9. Find the Command Line to Run the Program
10. Add Tomcat Server
1. Open the Exiting Projects
To open the java files in a folder:
Go to the top menu, File -> Open Projects From File Systems…, click the “Directory…” button, and navigate to the folder that contains the java files.

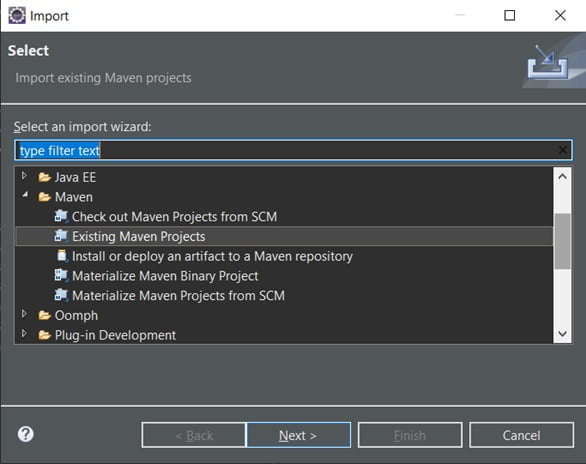
To open the Maven project:
Go to the top menu, File -> Import…, select Maven -> Existing Maven Projects, and click Next. In the “Import Maven Projects”, click the “Browse…” button, and navigate to the folder that contains pom.xml.
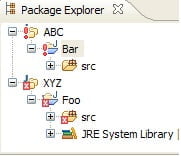
2. eclipse remove red mark on project in Package Explorer
If you see red cross or exclamation mark on the project in the Package Explorer, open “problem” to find the errors and fix them.
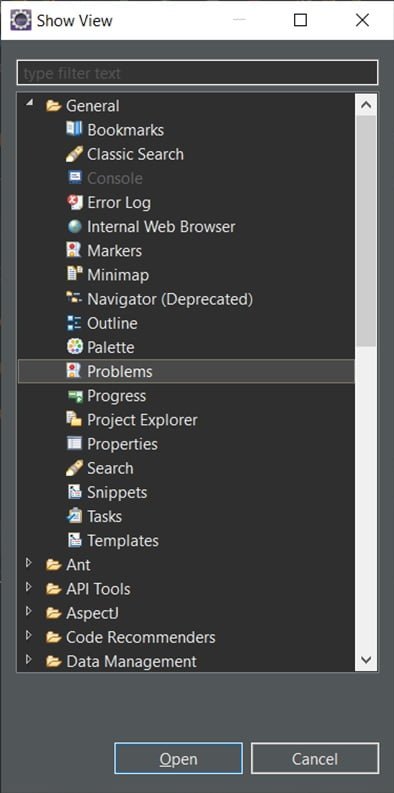
Go to the top menu, Window -> Show View -> Problems. If “Problems” is not in the right list, select “Others…” and select the Problems.
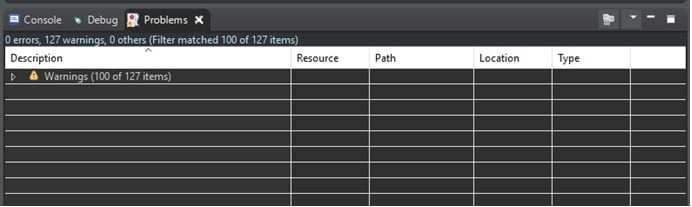
In the “problem” tab, expand and read the details about the errors. Fix the error by its description. If you think the error can be ignored, right click and delete it.
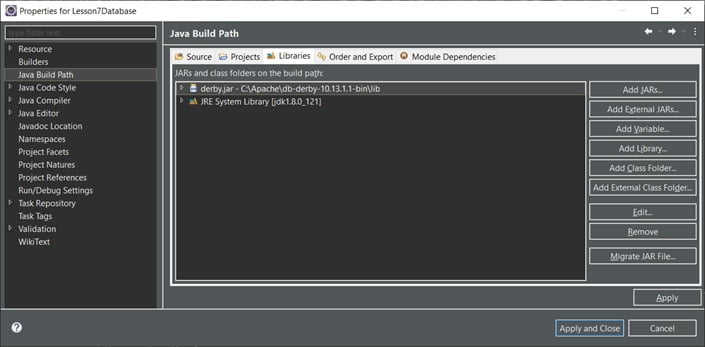
3. Change System Library
When you open somebody else’s projects in your Eclipse, you may see the Java files have errors in importing Java packages. To fix this, you need to change the system library for the project.
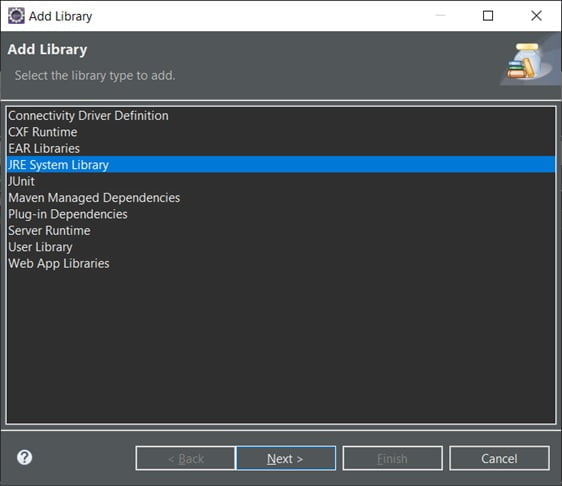
In the Package Explorer, right click the project -> build path -> configure build path…, click Libraries tab. Highlight the “JRE System library”, click “Remove” button.
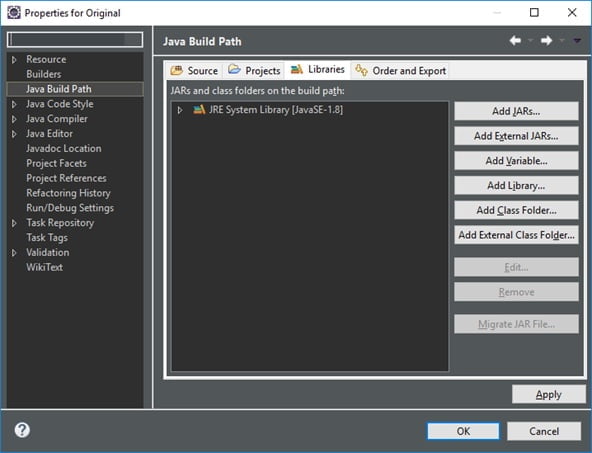
Then click “Add Library…” button, select the “JRE System Library”, click “Next”. Add the installed JDK on your computer.
Then click “Apply and Close”. The errors should be gone.
If it is a maven project, the JDK might be defined in pom.xml, as shown below. You should change the version accordingly.
<properties>
<maven.compiler.source>1.8</maven.compiler.source>
<maven.compiler.target>1.8</maven.compiler.target>
</properties>
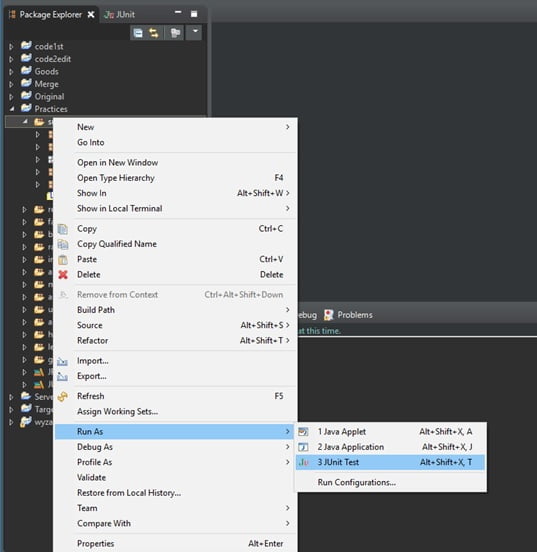
4. Run JUnit
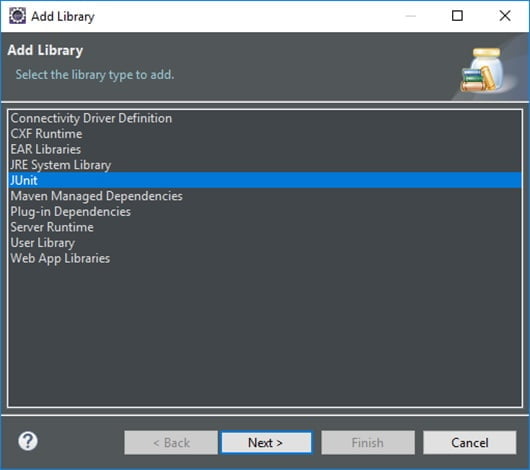
If you want to add JUnit test cases in the project, you have to add JUnit Library first.
Right click the project -> build path -> configure build path…, select “Libraries” tab. Click “Add Library…” button. In “Add Library” pop up, select “Junit”, click “Next”. In the next window, select “Junit 4” or “Junit 5” available in eclipse. Click “Finish”.
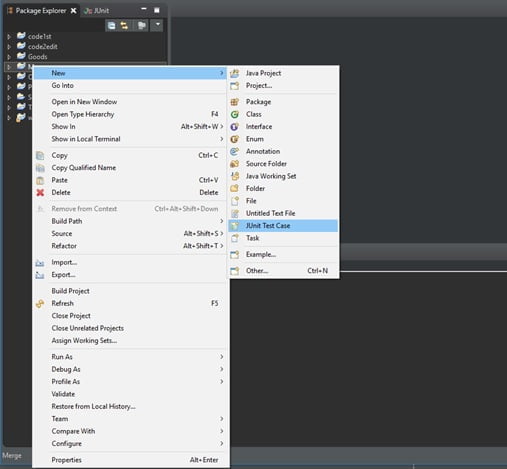
To add JUnit test case, right click project, New -> JUnit Test Case.
To run the test cases, right click the project , Run as ->JUnit Test.
5. Import External JARs
Some projects require external jar files, such as gson, Java fx, derby embedded db etc. First, you need to download the jar files online. Then right click the project -> build path -> configure build path…, select “Libraries” tab. Click “Add External JARs…” button at right, navigate to the folder where the jar files are located. Select the jar file, click “OK” button.
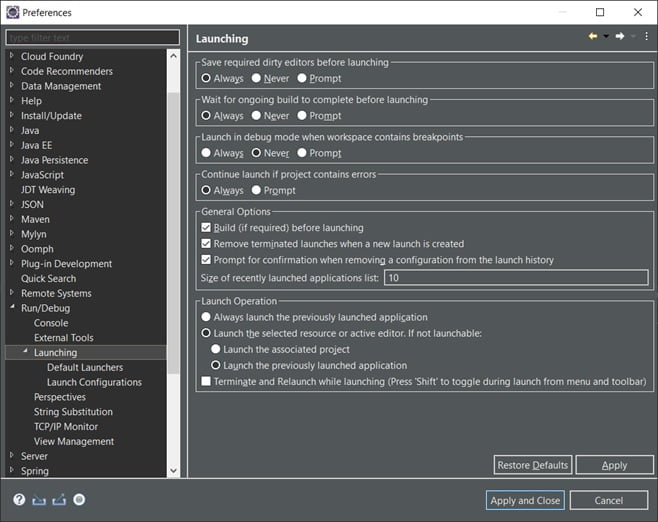
6. Turn on Autosave in eclipse settings
When you make any changes in the code, you can run it without clicking the saving button. This is autosave. You can turn on autosave in the preferences.
One way is to Window->Preferences -> General->Editors->Autosave, and check the box “Enable autosave for dirty editors”.
Alternatively, Go to top menu, Window -> Preferences -> Run/Debug -> Launching. In “Save required dirty editors before launching”, check the radio button “Always”.
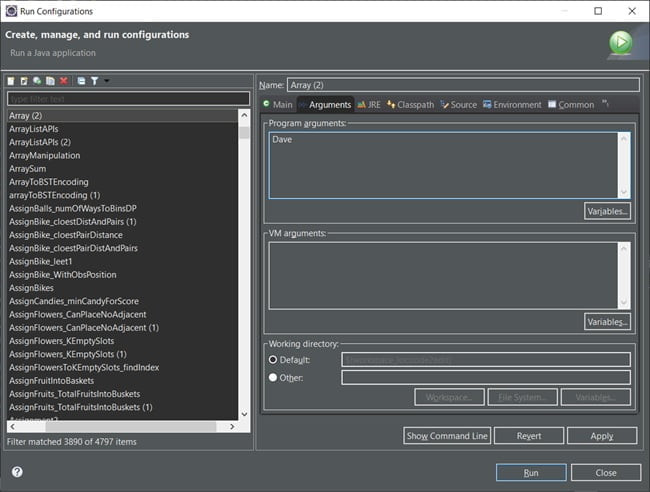
7. Run with Arguments
If you want to pass the values to the program args (the same as how you run from the command line), you can define the arguments in Eclipse:
Right click the project, select Run As -> Run configurations…
select “Arguments” tab, enter values in one line, separated with space.
8. Increase JVM heap size
If your program reads in a big file and runs out of memory, you need to increase the heap size.
Right click the project, select Run As -> Run configurations. Click “Arguments” tab. In VM Argument area, Increase heap size like this “-Xms4096m -Xmx4096m”

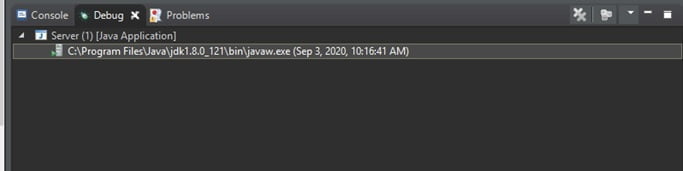
9. Find the Command Line to Run the Program
Sometimes after you compile the code and run it successfully in Eclipse, you want to run from Java programs (eg, multi-threading programs) from command lines. If you run into errors such as Java class not found, you can get the command line arguments from Eclipse.
Go to the top menu, Window -> Show View -> Others…, select “Debug” in window “Show View” . The Debug tab will appear next to Console.
Right click the last line in Debug -> properties
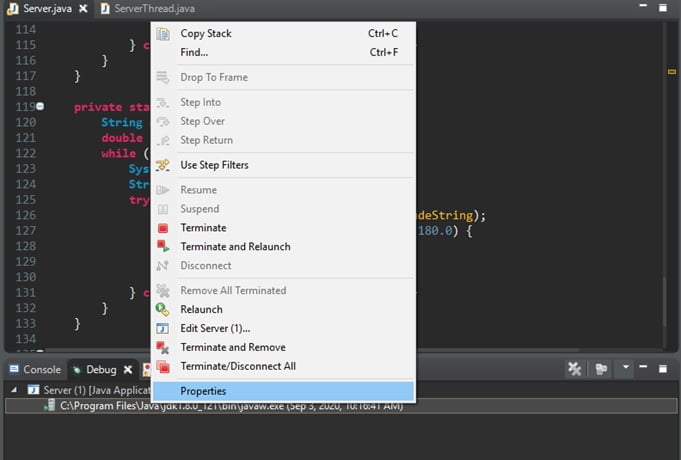
The “Properties for” window will show the Path and Command Line. You can copy this line and paste to your cmd window (Windows) or terminal (Mac) to run the java command.
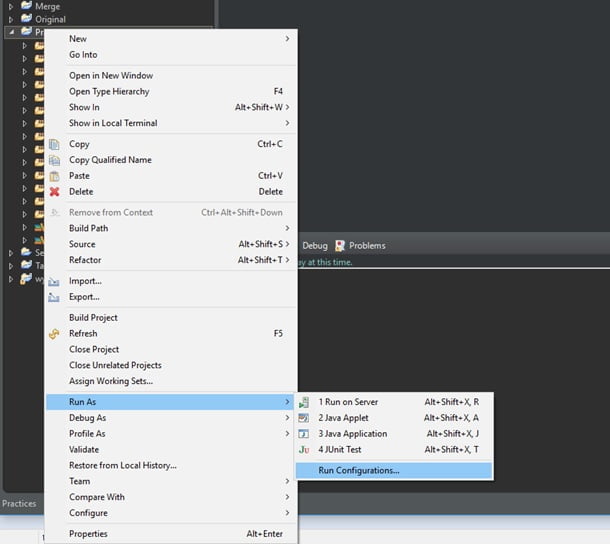
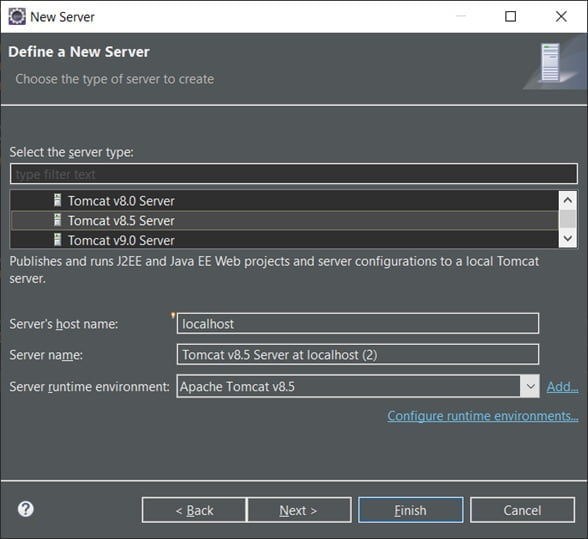
10. Add Tomcat Server
When you build web applications or web services, you need to install a web application server for test purposes. Apache Tomcat is one solution. You can download the Apache tomcat zip file at https://tomcat.apache.org/.
Unzip the folder to the local drive. In Eclipse, Go to the top menu, File -> New -> others…, select “Server”, click “Next”. Select the version you downloaded and click “Finish”.
To run the web project, right click the project, Run as -> run on server.

FAQ
Eclipse how to remove the red mark on the project (if you have already tried many things)?
- Open Problems view
If you have tried things like removing and adding the system library, removing and adding files or folders, etc, and the red cross or exclamation is still there, Do this, go to the top menu, Window -> Show View -> Problems. If “Problems” is not in the right list, select “Others…” and select the Problems. The Problems view shows up at the right lower part of the window.

- Delete the error
In the Problems view, expand and read the details about the errors. Fix the error if the error message makes sense to you. If that still doesn’t help, right-click the error message and delete the message.


