TensorFlow is an end-to-end open-source platform from Google for machine learning. If you want to study AI or work on an AI project, setting up a development environment with TensorFlow on a local machine will allow you have a smooth sailing. GPU (Graphics processing unit) is a specialized processor originally designed to process data simultaneously. It helps to speed up the computation of your deep-learning code. This is a complete guide to installing TensorFlow GPU on Windows. The installation involves many steps. Let’s get started.
Table of Content
- Download Nvidia graphics driver
- Check software compatibilities at Tensorflow site
- Install Visual Studio Community 2019
- Install CUDA Toolkit 12.3
- Install cuDNN 8.9.7
- Install Anaconda3
- Create virtual environment
- Install Tensorflow 2.10
- Install PyCharm
- Install additional packages
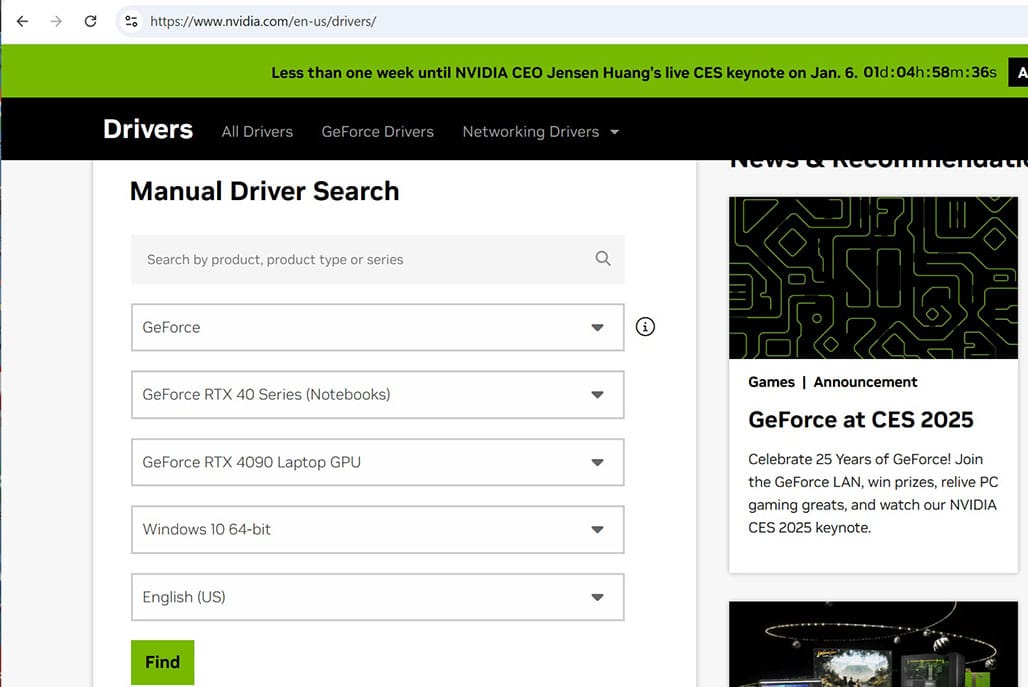
1. Download Nvidia graphics driver
If you already have a PC with GPU, you can skip this step. If you are going to get a new machine learning PC with GPU, please check CUDA enabled GPU cards before buying one. I suggest you buy a PC with a Nvidia graphic card having at least 12GB GDDR6 or GDDR6X. If you just got a new PC with Nvidia GPU, you go to Nvidia driver to download the graphic card driver. After downloading, you run the exe file to install.
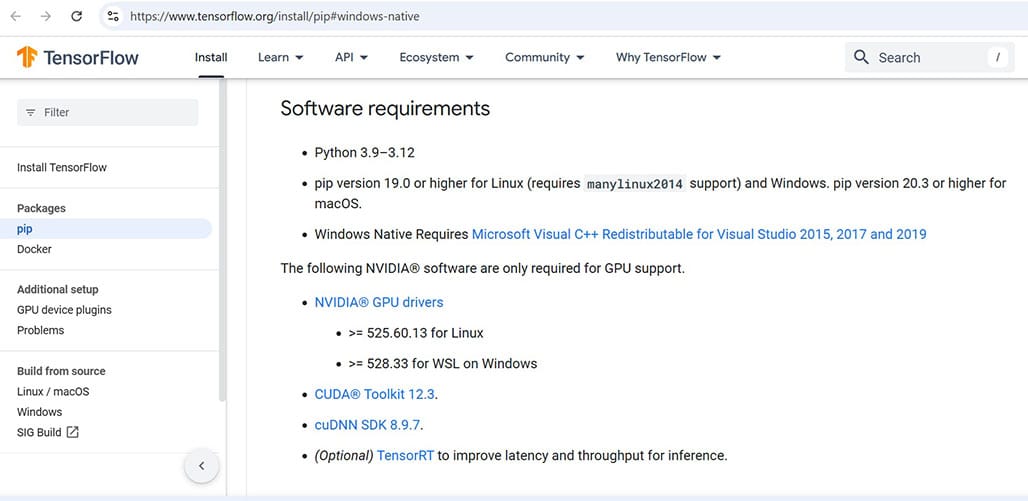
2. Check software compatibilities at Tensorflow site
Normally you get the latest version when installing any software. That’s not the case here. You have to check the compatibility between software. Go to TensorFlow install guide to get software requirements. This will help you avoid headaches.
3. Install Visual Studio Community 2019
The tensorFlow install guide says “Windows Native Requires Microsoft Visual C++ Redistributable for Visual Studio 2015, 2017, and 2019.” Please note it is not the latest version 2022. You go to Visual Studio old downloads to get 2019. After you sign in, select Community 2019 and download.
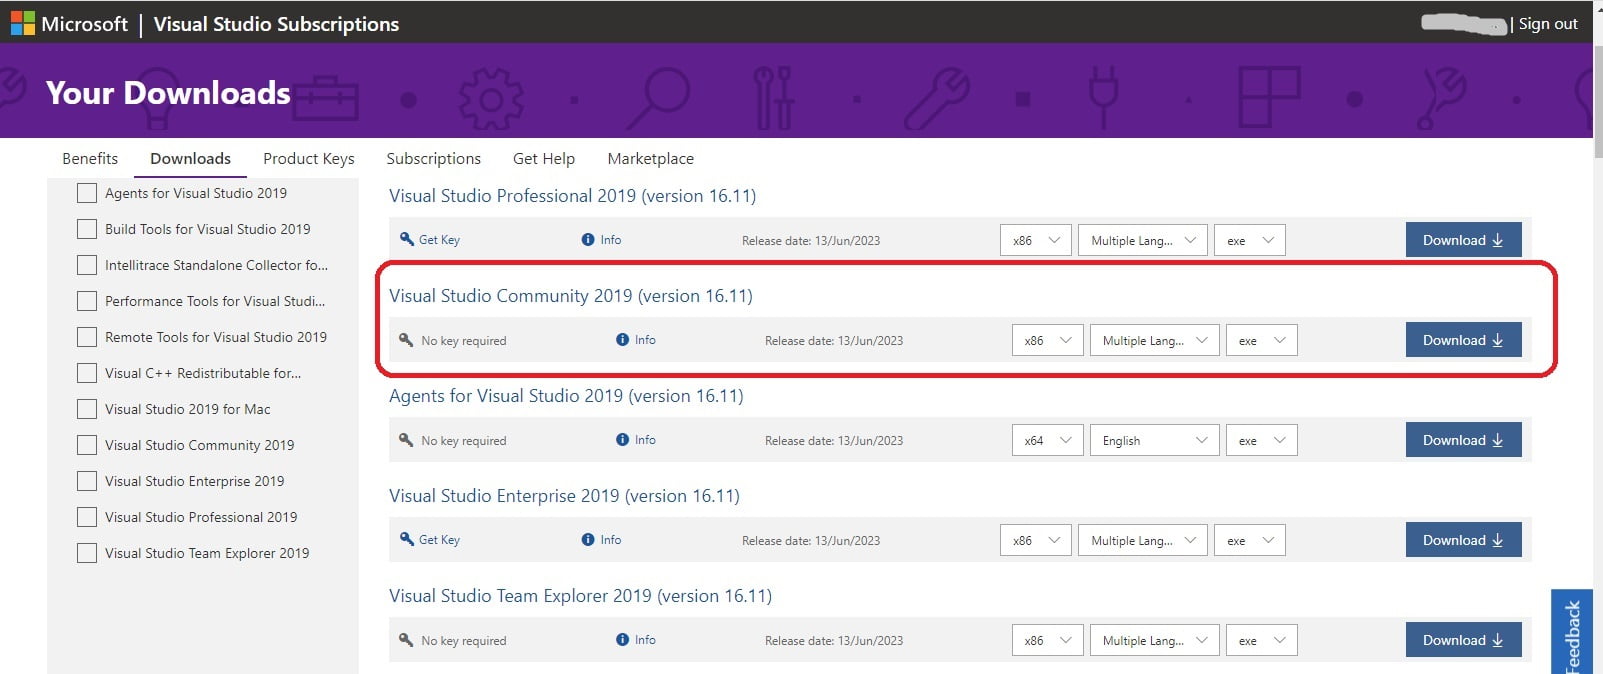
When you run the installer, select “code editor” on the right side of the window. Click “Continue” and finish the installation.
4. Install CUDA Toolkit 12.3
CUDA is a software layer that gives direct access to the Nvidia GPU’s virtual instruction set and parallel computational elements. According to the TensorFlow install guide, you need CUDA 12.3. Go to the CUDA Toolkit archive at Nvidia, and select CUDA ToolKet 12.3.0. In the next window, select Windows, the version of your operation system, and the installer type, you can download and follow the default to install it.
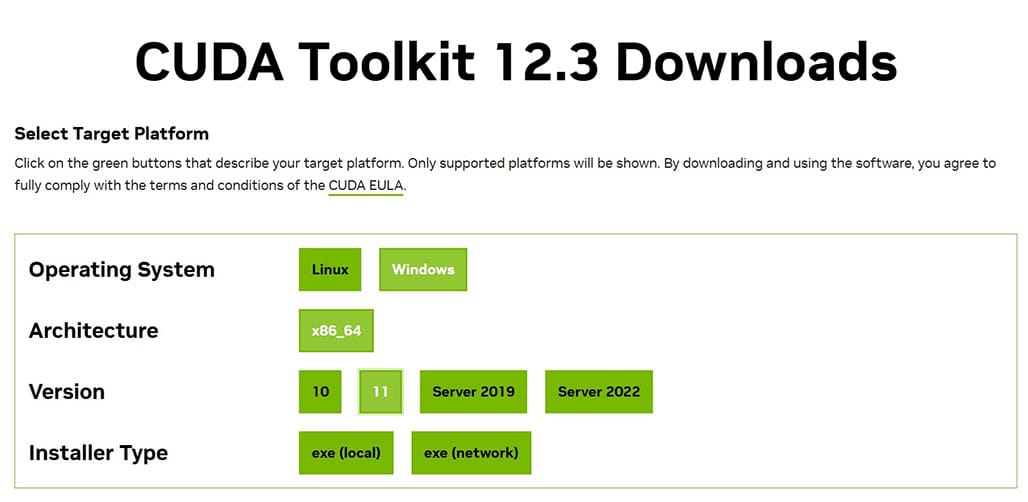
It is installed at C:\Program Files\NVIDIA GPU Computing Toolkit\CUDA\v12.3\.
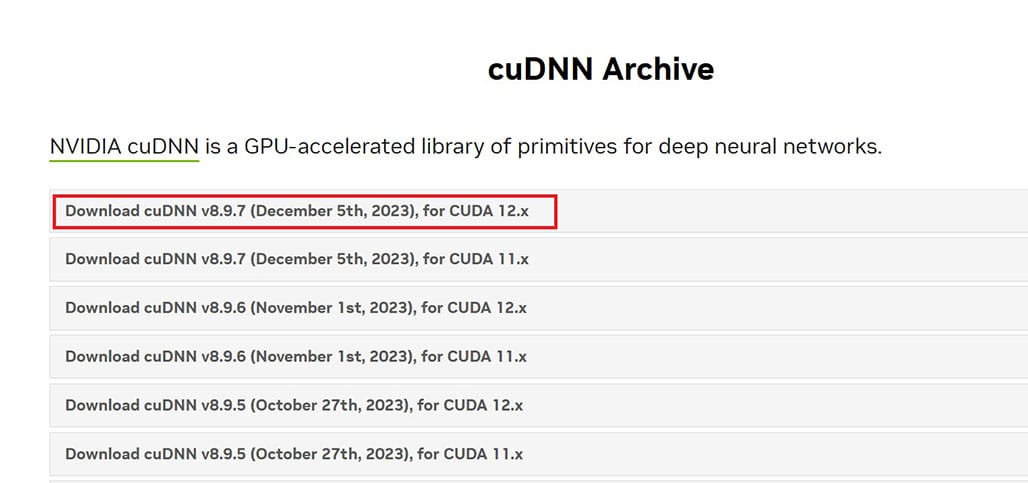
5. Install cuDNN 8.9.7
The Nvidia CUDA® Deep Neural Network Library (cuDNN) is a GPU-accelerated library of primitives for deep neural networks. Go to Nvidia’s cuDNN Archive, and download cuDNN v8.9.7 for CUDA 12.x.
Extract the downloaded zip file and copy three subfolders, i.e. include, lib and bin.
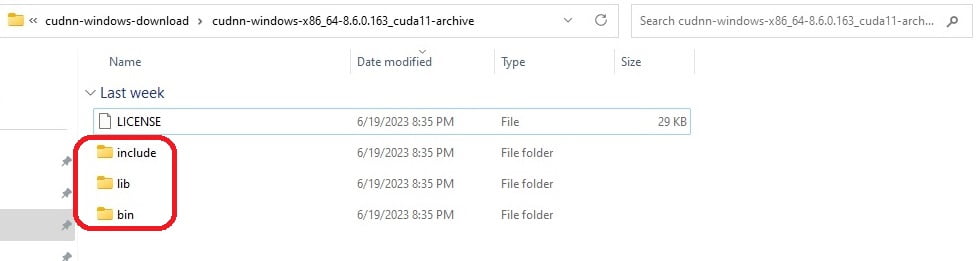
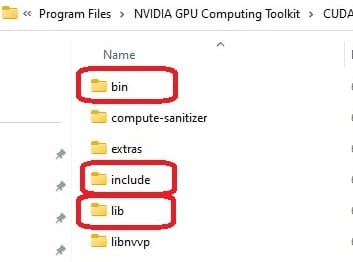
Paste them to the CUDA install folder at C:\Program Files\NVIDIA GPU Computing Toolkit\CUDA\v12.3\. New files are added to CUDA.
Open the “Environment Variables” window, and add the following new two paths:
C:\Program Files\NVIDIA GPU Computing Toolkit\CUDA\v12.3\bin
C:\Program Files\NVIDIA GPU Computing Toolkit\CUDA\v12.3\libnvvp
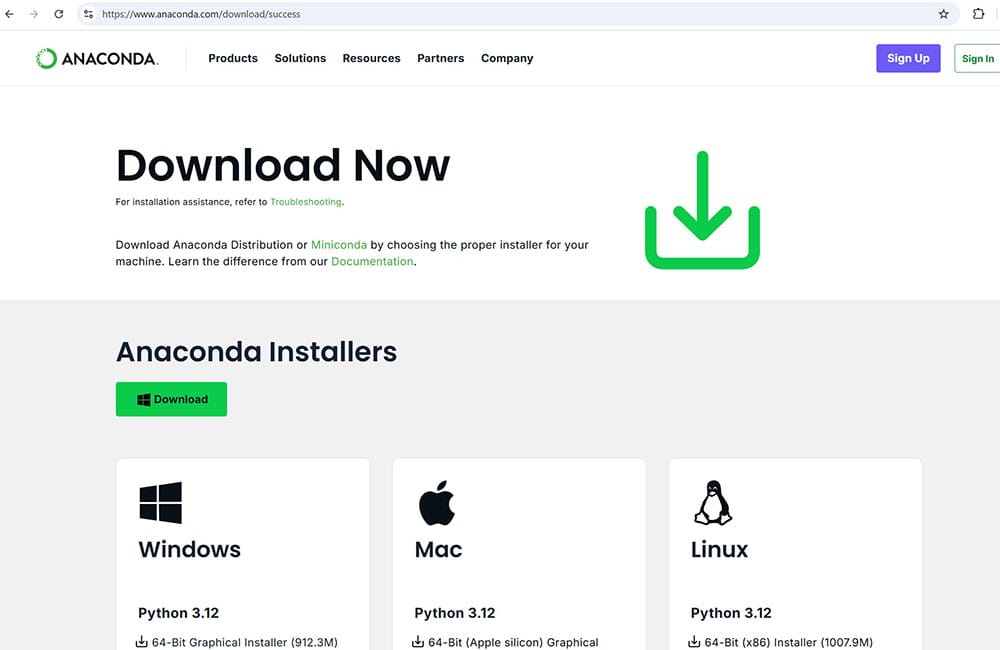
6. Install Anaconda3
Conda is an open-source package and environment management system that runs on Windows, macOS, and Linux. Conda quickly installs, runs, and updates packages and their dependencies. To install, go to Anaconda site to download Anaconda installer, click the download button at the top, or go to the bottom to select the particular version for your PC.
After you run the installer, Anaconda3 is installed at C:\Users\yourusername\anaconda3. It also installs Python 3.12 there. Remember to add the following paths in “Environment Variables”:
C:\Users\yourusername\anaconda3
C:\Users\yourusername\anaconda3\Library\bin
C:\Users\yourusername\anaconda3\Scripts
Now let’s create a shortcut to run Anaconda. In the window search bar at the bottom, search for “Anaconda Prompt” or “Anaconda Powershell Prompt” (either one is fine). Right click the icon in the Search Recent, select “Pin to start” or “Pin to taskbar.”
Click the pinned icon, a prompt window opens. It shows “(base) C:\Users\yourusername>.” The name inside the parentheses represents your current environment. The “base” is a default env.
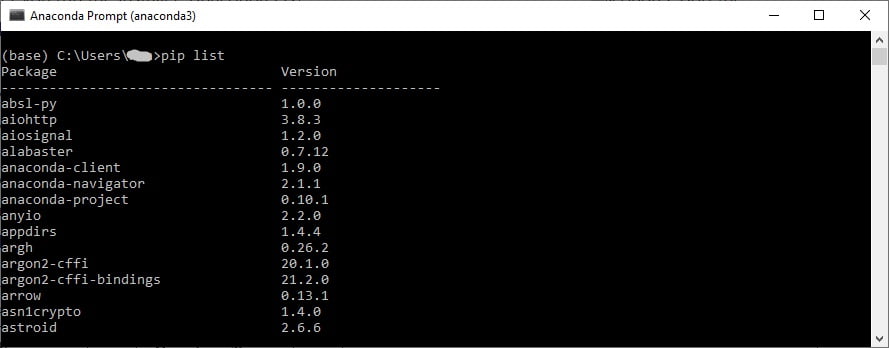
You can run conda or pip commands to see what packages have been installed.
$conda list
$pip list
7. Create virtual environment
A virtual environment is an isolated environment for Python projects. Each project can have its own dependencies, regardless of what dependencies every other project has. Now we create a virtual environment for TensorFlow GPU support. Open the Anaconda prompt window, and enter commands:
$conda create –name tf_env python=3.12
$conda activate tf_env
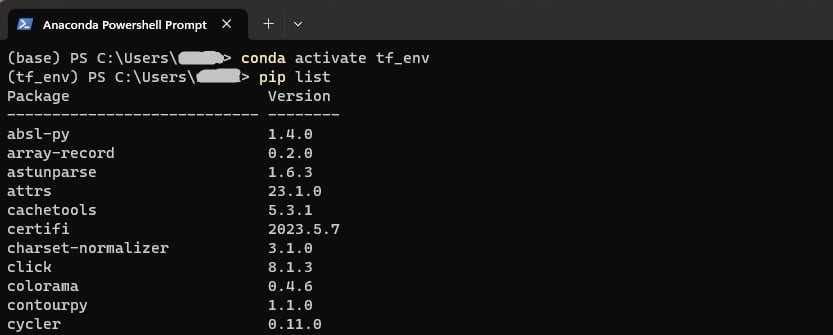
The “(tf_env)” at the beginning of the prompt shows that you are in the “tf_env” env.
8. Install Tensorflow 2.10
TensorFlow requires a recent version of pip, so upgrade your pip installation to be sure you’re running the latest version. Enter the following command in the Anaconda prompt.
$pip install –upgrade pip
Please check out TensorFlow install guide for windows. Note that you should install TensorFlow 2.10.

To install TensorFlow 2.10, enter the following command in Anaconda prompt.
$pip install “tensorflow<2.11"
This command installs TensorFlow for both CPU and GPU, and other common used packages such as keras, numPy.
To check whether TensorFlow is installed correctly with GPU support, enter the following command in the Anaconda prompt:
$python -c “import tensorflow as tf; print(tf.config.list_physical_devices(‘GPU’))”
If it returns something like the following line, you have successfully installed TensorFlow with GPU support.
[PhysicalDevice(name=’/physical_device:GPU:0′, device_type=’GPU’)]

9. Install PyCharm
Now you can use Jupyter Notebook in Anaconda3 to enter and run your project. However, I prefer to use IDE, which gives me more control. PyCharm is an integrated development environment used for programming in Python. Go to Download PyCharm at jebrains site. Download the Community version and run the installer.
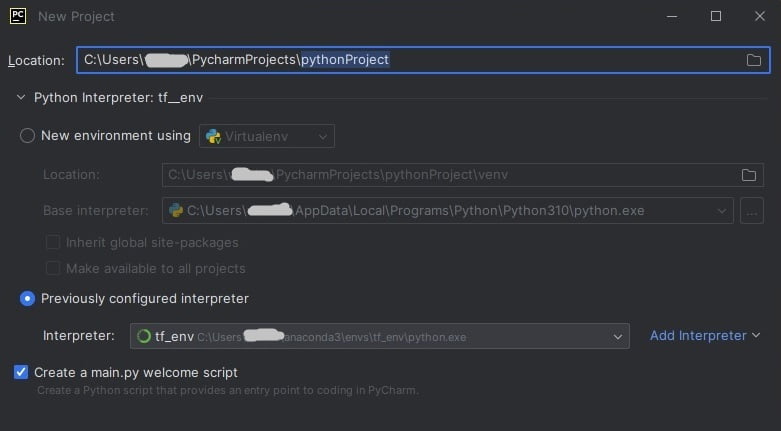
After installation, open PyCharm and create a new project. In the Python interpreter, check “Previously configured interpreter”. In the drop-down, select “tf_env” you just created.
If you have created a project before and want to change the virtual environment, you can go to file->settings -> project. In the Python interpreter, check using the existing environment. In drop-down, you can select other env.
10. Install additional packages
To install additional packages or modules, you can run pip in the Anaconda prompt. For example,
$pip install scikit-learn
$pip install pandas
$pip install transformers
The latest version will be installed.
For some packages, you may need to install a particular version. For example, protobuf has to be 3.19.* to be compatible with TensorFlow 2.10.
$pip install protobuf==3.19.*
Congratulations! Now you are ready to run TensorFlow machine learning projects on your PC.


